Floor Plans
How to add a Floor Plan on a Customer's Location
Path: Log in -> Dashboard -> Customers -> Select Customer row -> Overview -> Locations Tab -> Floor Plans -> Add Floor Plan

- Once you have created a customer and added a location, you can add floor plans for each location. This allows you to add and place devices within the layout.
- In the Customers Table, find the customer row you desire.
- On the far-right side of the row, under the Actions column, hover over the first button from the left -- it will say "Overview".
- Click it, and you will be redirected to the customer's page on our system.
- Click on the Locations tab and find the location you want to add floor plans.
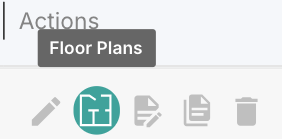
- On the far-right side of the row, under the Actions column, hover over the second button from the left -- it will say Floor Plans.
- Click it, and you will be redirected to the Update Location page. There, click on the Upload A Floor Plan Design button.
- A window will pop up, where you can name and upload the Floor Plan you want.
- Press the Continue button.
You have successfully uploaded a floor plan.
note
Multiple Floor Plans can be uploaded on the same location.